As a reward for doing too much work too quickly, I got the privilege of downloading and learning another AR interface. Now, this, I’m excited about.
When I get back to uni tomorrow, I’ll try and make my work brief-responsive. Or recreate my work from artivive in the Aero interface.
There are a couple of more interactive features, ones I’m really excited about. Animations and movements playing when you tap, or anchoring AR to the floor or walls rather than just images.
What’s not very clever? Attempting to climb down slick concrete steps to the seafront when it’s pitch dark. But if you’ve got a huge crush on the guy you’re with, you might not be thinking straight. Actually, the thought of sitting by the sea with an attractive man in the dark might seem like a very good idea.
Drake and Ludwig are both so shy, I find myself having to write in events that physically push them together. This includes, but is not limited to, fainting from hunger, tripping over a tree root, getting shot by an arrow and needing to be carried, needing to take measurements as a tailor, having to huddle together from a sudden shower, having to hide when friends were looking for them, pretending to joust and de-horse each other, being set against each other at dunking the other in a river. Having to be led in the dark by the other when one was a vampire. Needing to be carried back into the sea by the other when one was a mermaid (and for posterity, Ludwig didn’t need carrying. He’s cheeky).
And the latest – spraining an ankle on the way down to the sea.
Ok, I’ve talked enough. You deserve to hear about some art now.
A really interesting process for this one, experimental, seeing what worked and how I can push stuff further.
I sketched out thumbnails traditionally, creating five or six quick compositions to see if I could get lines of action exciting, highlight where the load was being borne (Drake is taking some of Ludwig’s weight, which is important).
I created a proper sketch digitally, because this gives me a chance to resize proportions and get something looking good that can be reworked quickly.
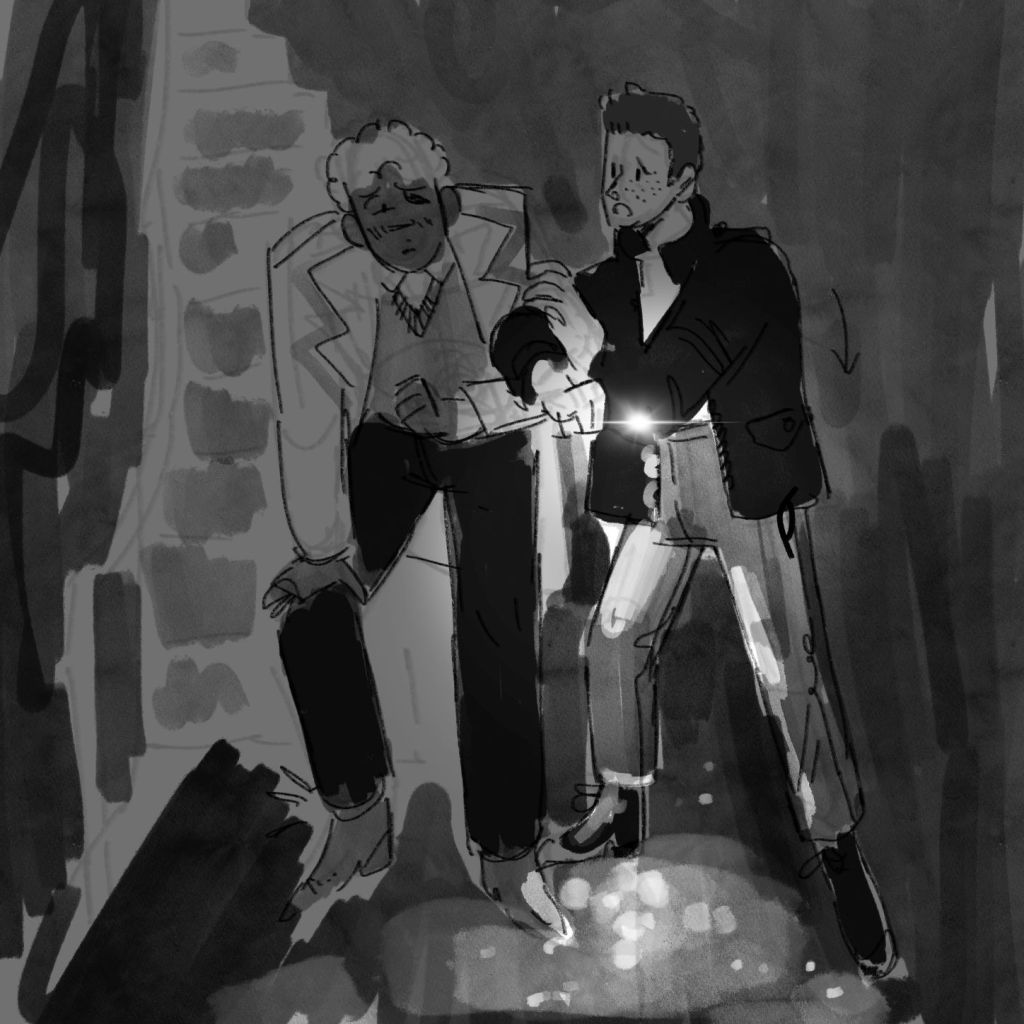
Once I had this sketch, I worked underneath it very quickly in tone, and then a background. And then I threw a multiply layer on top because it’s dark, and then I remembered that they use their phone torches – a perfect opportunity to get a light source in there and stop it from being completely murky. What do they call this? A tonal key?
I think this sketch in itself is really successful. The dark night against the high tonal contrast of a grating phone torch is nice. I think the suggested background is just fab. You can see the texture of the rocky beach, and the suggestion of the steps in the background creates depth.
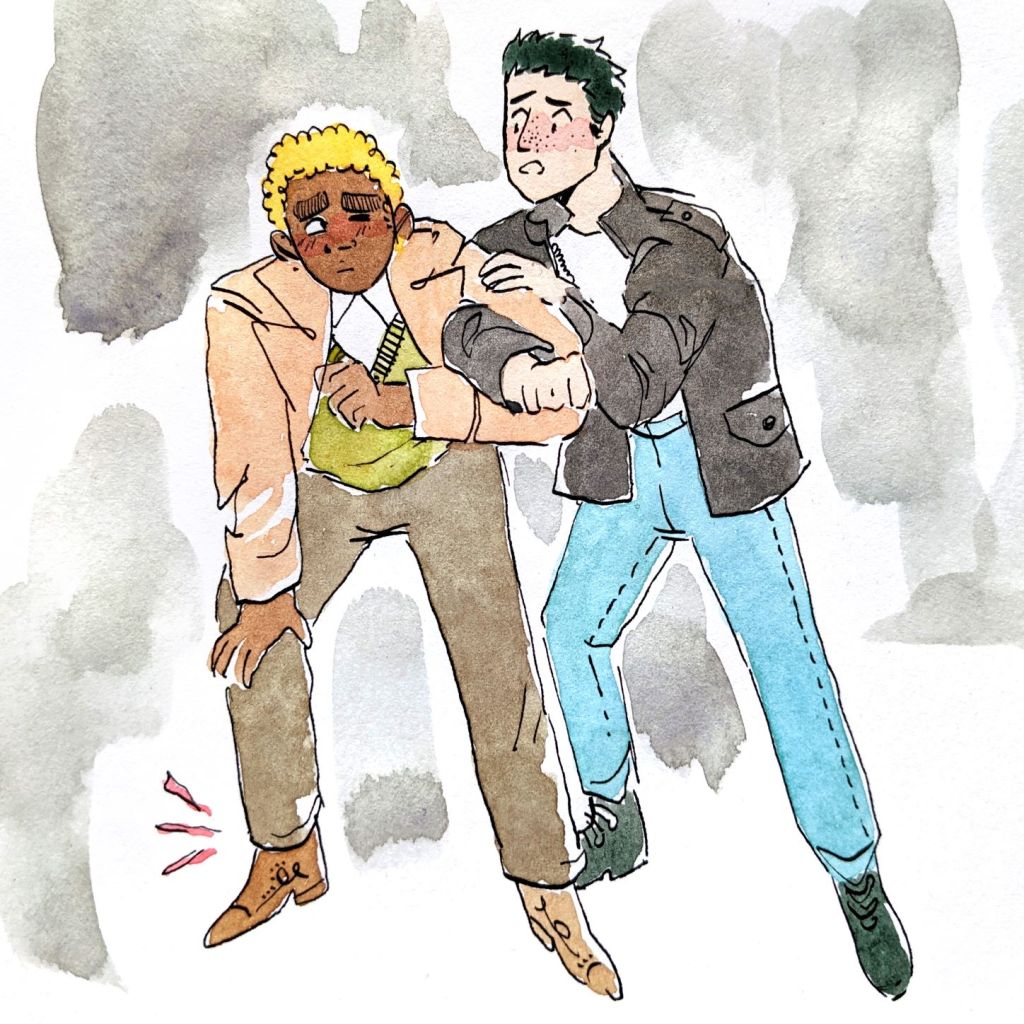
I took this sketch as an inspiration and created an ink drawing traditionally. I was proud of this too. Below is the drawing coloured, although it’s crucial that you know that I watercoloured the original after working up the digital illustration.
I looked up some Q Blake illustrations for colour information, and the inky suggestion of atmosphere is inspired by this. If I did it again, I would have weighted the background to the bottom, not the top. I’m happy with how the colours on the bodies are.
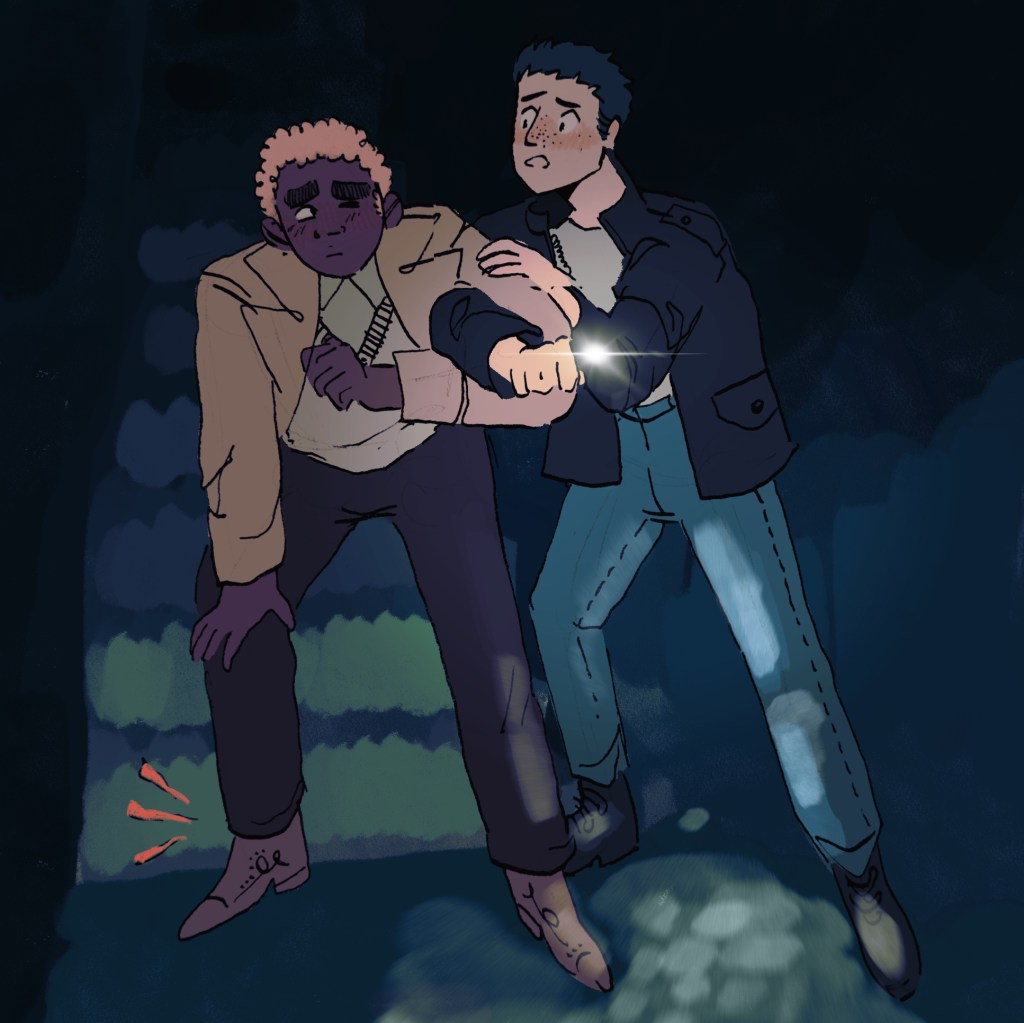
When I went digital, I tried out slightly tighter colouring alongside the very playful, expressive lines.
The illustration, when coloured fully, was a bit too saturated. You know when it’s dark and you can see fewer colours?
SO I created a gradient map with greeny blues and bluey greens, and shoved the illustration through that. It looked good and more uniform, but it was too green. I looked at my full colour version and my bluey version and thought, “I need somewhere in the middle of these.” Bing! Idea.
I overlaid the bluey version on top of the full colour version and played with layer effects and opacity. This meant that the blue version became a mask layer, but intimately responsive to the tone and colours underneath it – because it was just another version of the illustration. What came of it is this wonderful dreamy green-blue air to the image, but you can still tell what colour things are meant to be.
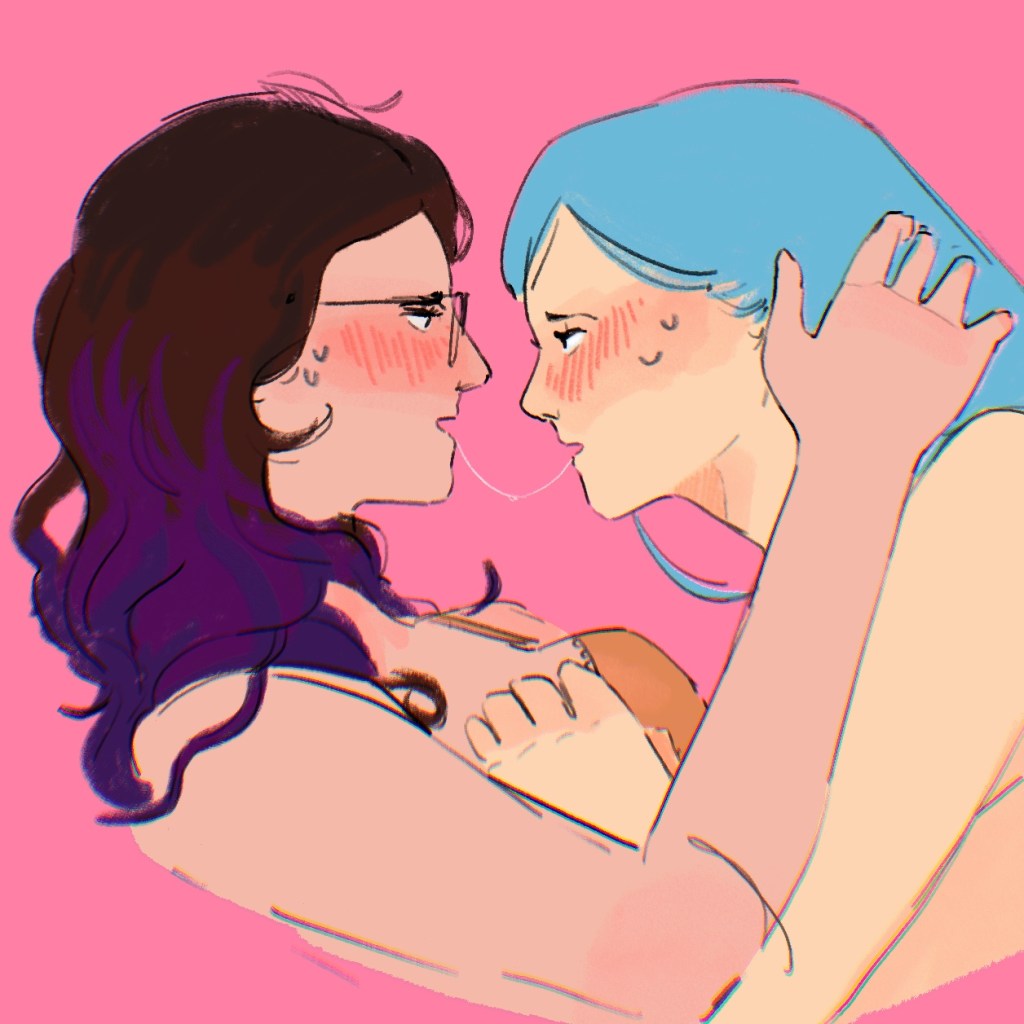
Ok, you’re allowed to go look at the watercoloured illustration now, because after I finished the digital one, I watercoloured the ink lines traditionally. This was intended less to create that dark, it’s-nighttime feeling. Rather, I just wanted it to capture the connection between the characters. I feel like overusing watercolour can make pieces a little dirty. A lot of Blake’s illustrations are just characters on white backgrounds, but they sing to you because you feel this wonderful energy coming from the characters or their interactions with each other. Just so you know what I was going for.
I think it’s hard to decide which of the two pieces are more successful, because my intentions were different for each (depending at least in part to the limits of the media I was working in). But I love the digital illustration, because you get more information about the story, context, temperature, time of day, etc. And that’s just because I’ve been writing for it.
The big caveat and danger with using photos like scans is that you HAVE to make sure your photo is a high quality, and use natural lighting to get it as flat as possible before interfering.
I made this tutorial because I realised suddenly that the feather tool in Procreate is absolutely perfect for unevenly lit photographs of work. So when using curves will bleach one half of an image while leaving the other still too dark, you can use a smooth gradient of selection to play with images in halves.
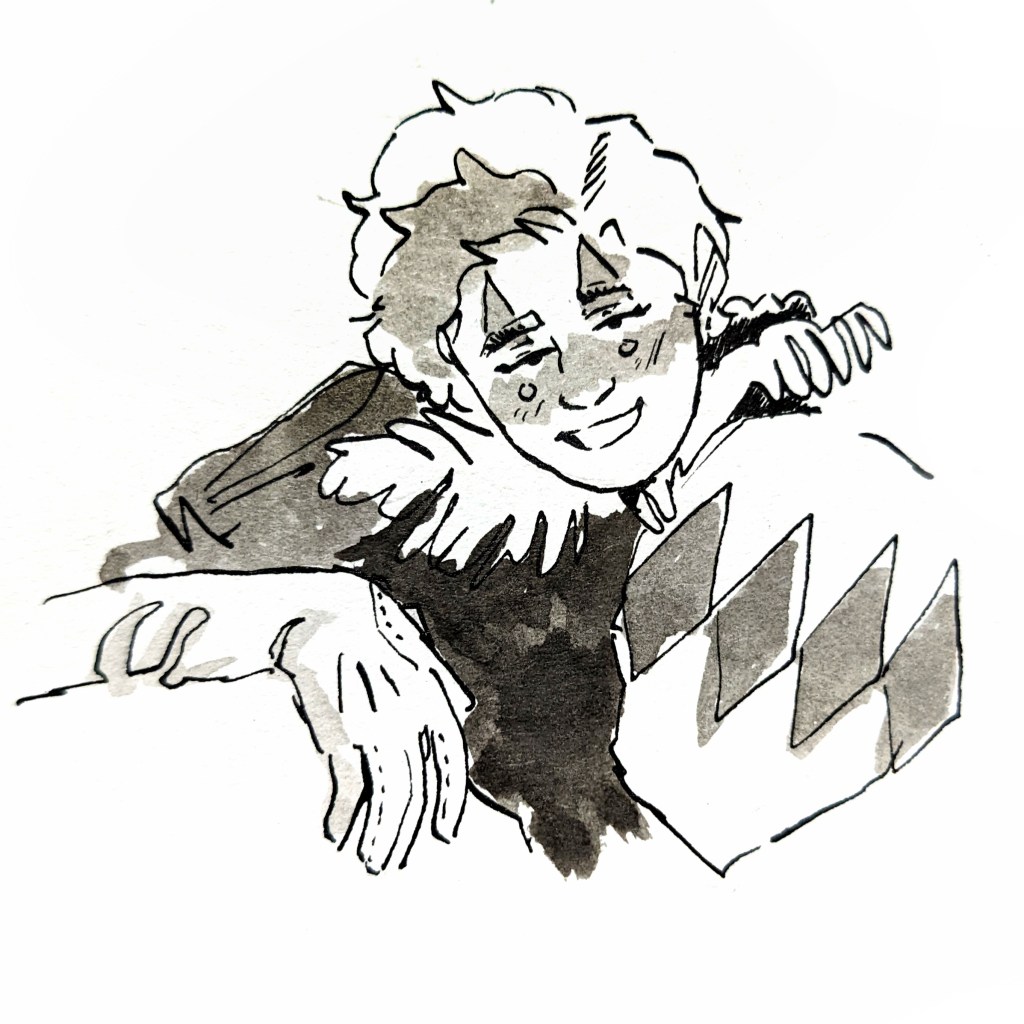
I had the idea to create a reel to that audio that’s going around – “I wanna be handsome, I wanna be pretty”. The convention is that people show themselves – or their characters, or whoever – looking good in clothes for both genders. I’ve had this audio saved for probably a year, and now was the right time, I suppose!
Antonia is the perfect victim for this. She’s a trans woman, but she also plays fast and loose with her fashion – and because she’s studying theatre and is a performer, she can convincingly play characters of any gender. She likes this flexibility and ambiguity.
I think the ink drawings I created for it are really wonderful. I’m loving creating playful traditional work.
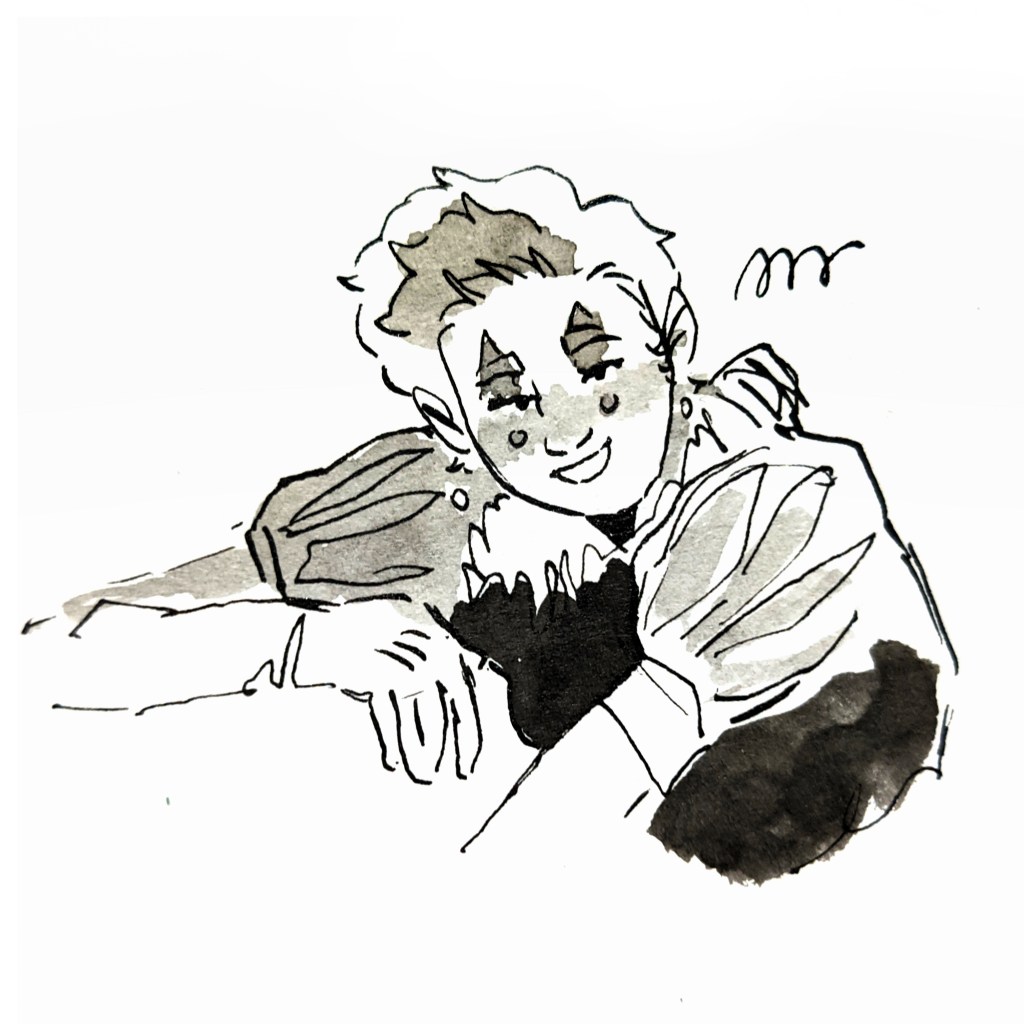
This frame was designed to be the intro to the audio. These clothes are just jester-ish. Before anyone starts drawing any lines about the face paint, I cannot stress enough that I copied her. She was wearing this makeup for a long time before I was.
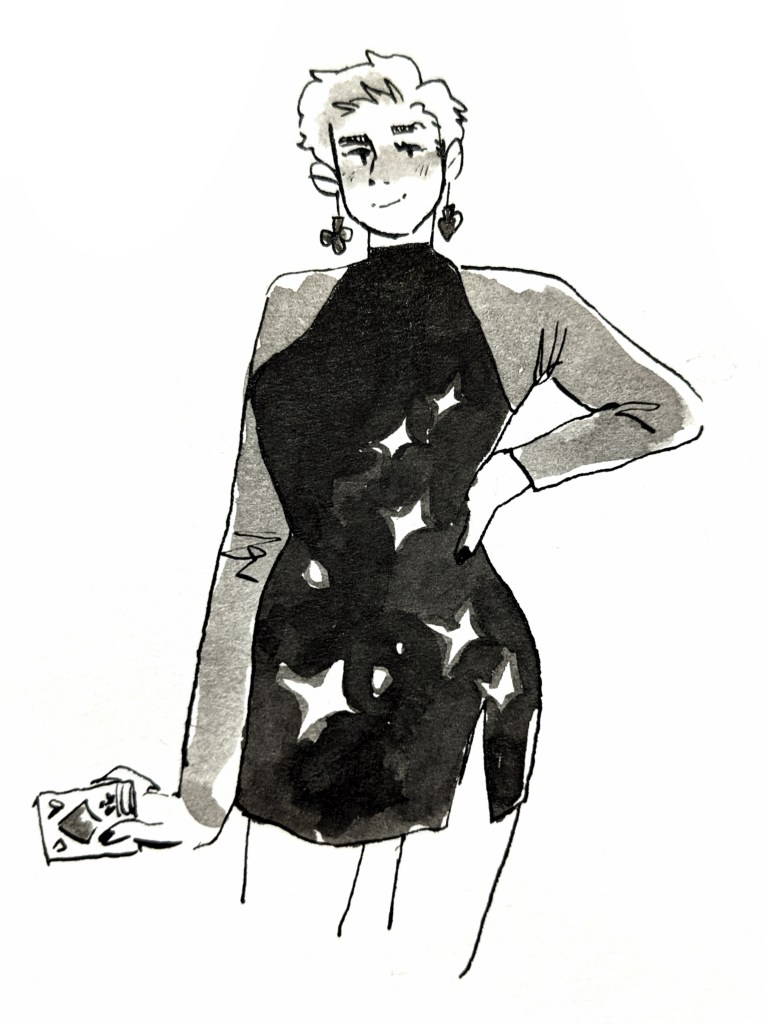
This didn’t have the expression I needed for the reel, but I am in LOVE with it. I seem to have accidentally drawn Antonia as wankered here. I just love it as an illustration – the markmaking, the shapes, the tonal spaces.
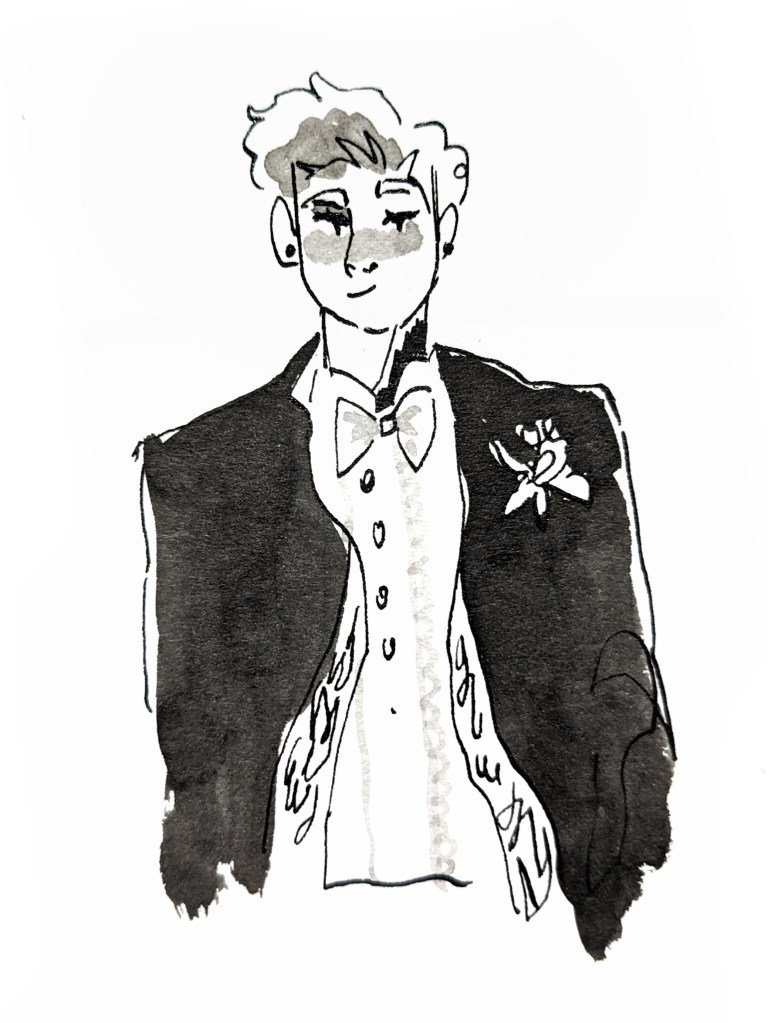
I Wanna be Handsome
I Wanna be Pretty
Haven’t actually made the reel yet, because the work became more about the illustrations than the end goal. I just love these.
I also made a video because I needed people to see how much process goes into creating these little guys.
This is about to be a compilation of work on the same topical thread.
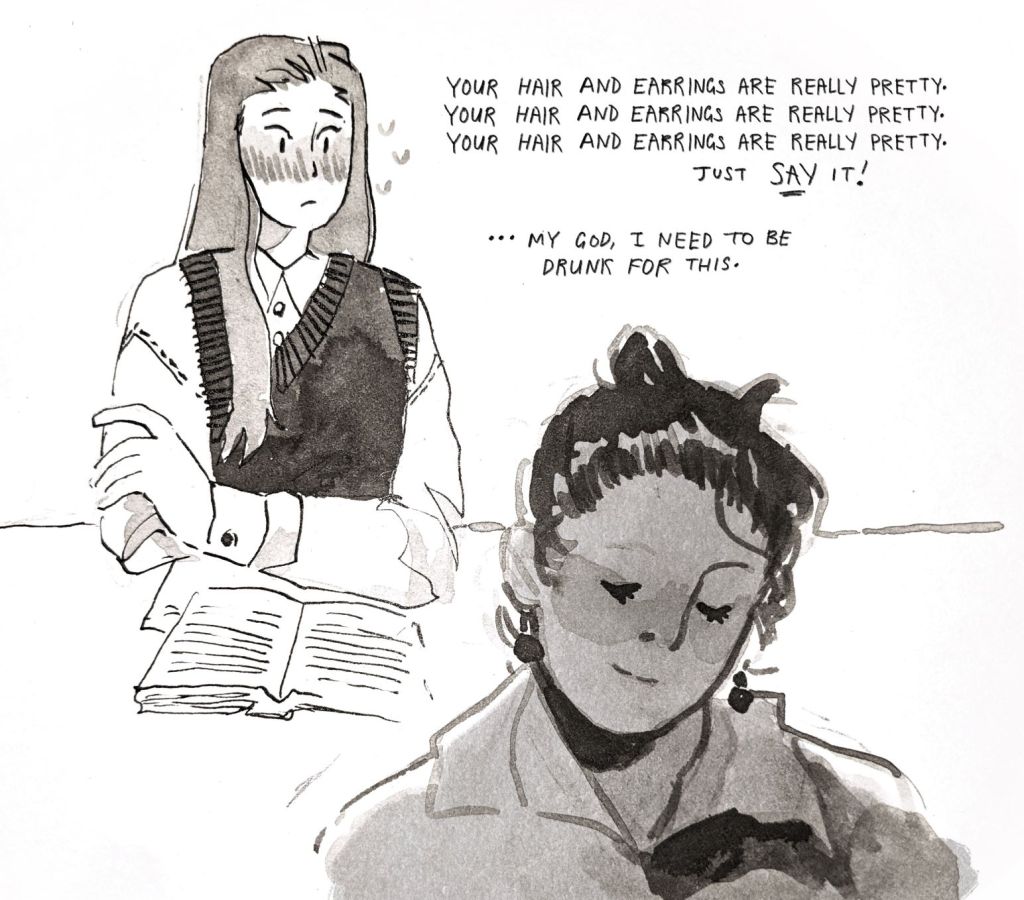
I’ve been thinking a lot recently about Techo right at the beginning of my plot starting. Techo’s big character streak is that she’s optimistic, positive, sunshiney. But this was hard learned: first, she suffers a particularly bad breakup in February of her third year studying Philosophy.
This leads to her going back on the pull, but how do you talk to girls? Lesbians are infamous for misreading signals as platonic and she’s shy.
She finds out quickly that she’s less shy when she’s drunk, and gets onto the clubbing scene. When she’s not drunk, she’s studying and writing for her dissertation. Her days swing intensely between intense thought and drowning the intense thought.
She has too many big thoughts: about how much she misses her ex, Mist, but also (as per the philosopher’s brain) about life, morality, happiness, death, the point of things. She remembers when a friend told her half-jokingly that people that know that much can’t be happy.
As we see her character grow throughout that summer (and when she meets Ludwig, then Mitzi, then Drake, then Antonia), she pointedly challenges this statement. So this isn’t a sad story, but we have to examine the sad parts.
I begin with an illustration I did of her and Mist… I have to warn you, this is saucy. Like, don’t scroll down if there’s someone looking over your shoulder.
One of those images that toes the line of whether I can look my tutors in the eye afterwards.
This was one of a few illustrations I did exploring her sexuality, but respectfully, I can’t put the others on a blog. This one is good though because it features Mist.
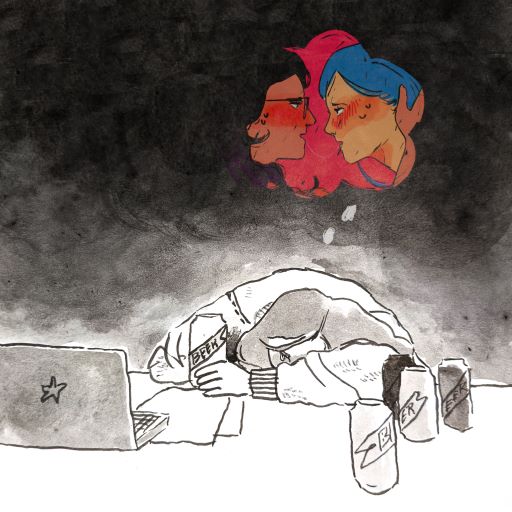
I then took to the ink and paper. I had an idea that I was going to draw Techo in a drunken stupor, and overlay her thinking about Mist, and have her laptop and dissertation notes in front of her too. Just trying to recreate an illustration that captures her life at the time.
I chose to do it in painted ink to create a slightly more expressive piece, and used a big brush to create a claustrophobic cloud that represents her mood, or drunkenness, however you want to read it. The plan was to overlay the colourful above image to try to drive home how that feels more colourful, vivid and real than what Techo is feeling at the desk, in the murky ink.
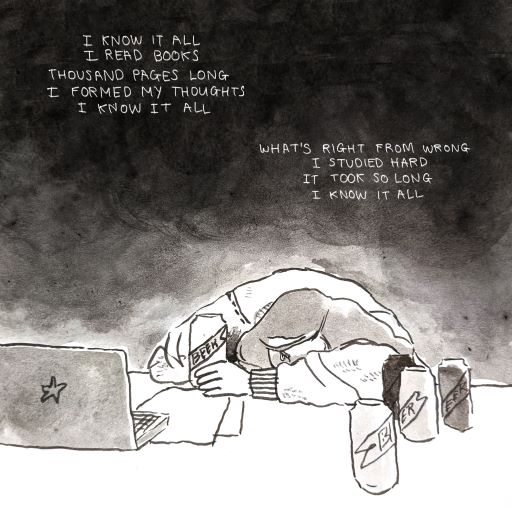
As I was making this illustration, Know it All by tv dinner came on shuffle. This is one of the songs I’ve had on Techo’s playlist for a while, and I thought it really suited this image – the bouncy song and absurd lyrics juxtapose the mood of the image. It also helps illustrate the other big reason Techo is drinking – her work is getting on top of her – she is wondering if there is a point to it all – etc.
But here’s the thing. I don’t want it to be read like poetry – the song is integral to how I experienced this illustration. How, said I, can I make the reader experience the song too? I can put the song over it. But how can I keep them there, before they click off after having seen the image? Ah, I can make the lyrics appear alongside the music. Will that be quite enough? I suppose if I animate the background, it might add even more to the claustrophobia and mood of the piece. And so we come to this.
What this journey has been is a marriage of process, taking things further and chance. And the video that came of it – and I will call that the final outcome – I think is successful. I think – hope – that a viewer could read from that image just about what I coded in.
Today was slightly manic. I got my “fire eating paper” thing to work in the artivive software, and I’ll throw my attempts together because I’m trying to evidence problem solving here. What happened is, the green is super artifacty, and the transparency thing doesn’t work particularly well. So I had to dumb down my ideas, basically, to make them work with the format so that there was no crossfade with green in the background.
Attempt 1: the crossfade with green fought with the software’s simple transparency issues and showed up as glitchy and green. Attempt 2: I tried to crossfade to white but forgot that that meant the whole video, not just the white screen, was affected. Attempt 3: I crossfaded to white on a resized white frame I imported in. This meant no crossfades to green/transparent and worked far better.
But as we can see, it worked really well! I threw it through premiere pro and made sure it was paced properly, and added a fire whooshing sound over it.
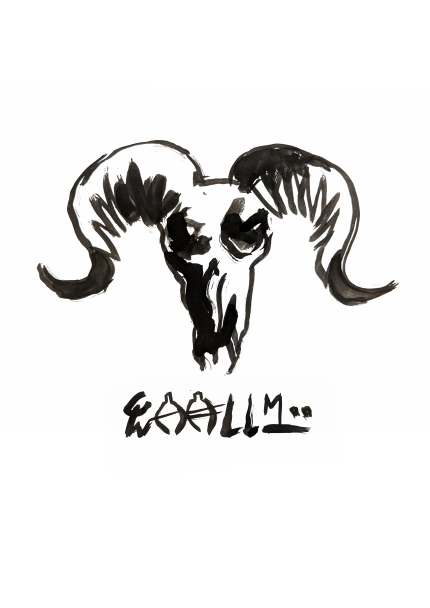
I did some very sexy drawing through process for the devil’s stationary.
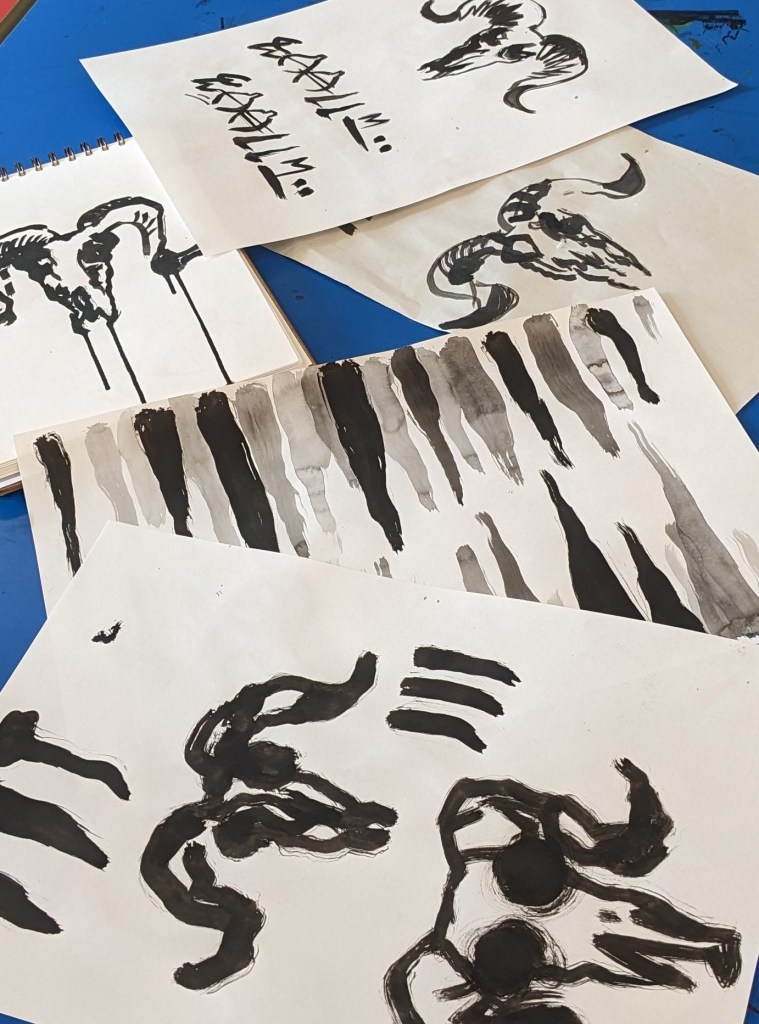
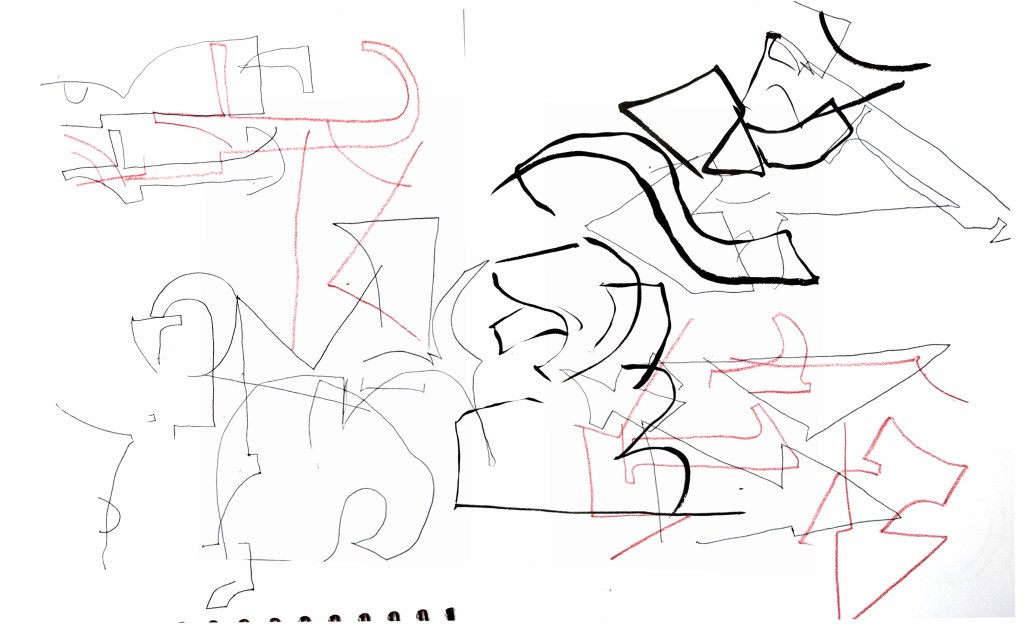
I started with some blind ink drawings of goats’ heads. I did about four of these. I then looked at them and did a few more drawings, using the most fluid and visually interesting parts of the blind drawings as inspiration. I did partial peek and kept my hands very loose because the tighter ink drawings weren’t as successful as some of the looser ones. I came up with this:
You can see I’ve also done a few versions of hell’s language. These figures were hieroglyphic in nature, and I based the figures off of goats’ eyes, stalactites, flies, etc. I decided in my process notebook that the information would have to be in Hell’s language, as it’s scarier for humans not to know what it says. Imagine if it said “low-ranking secretary demon”. You wouldn’t feel that scared getting processed by Jeff from Accounts.
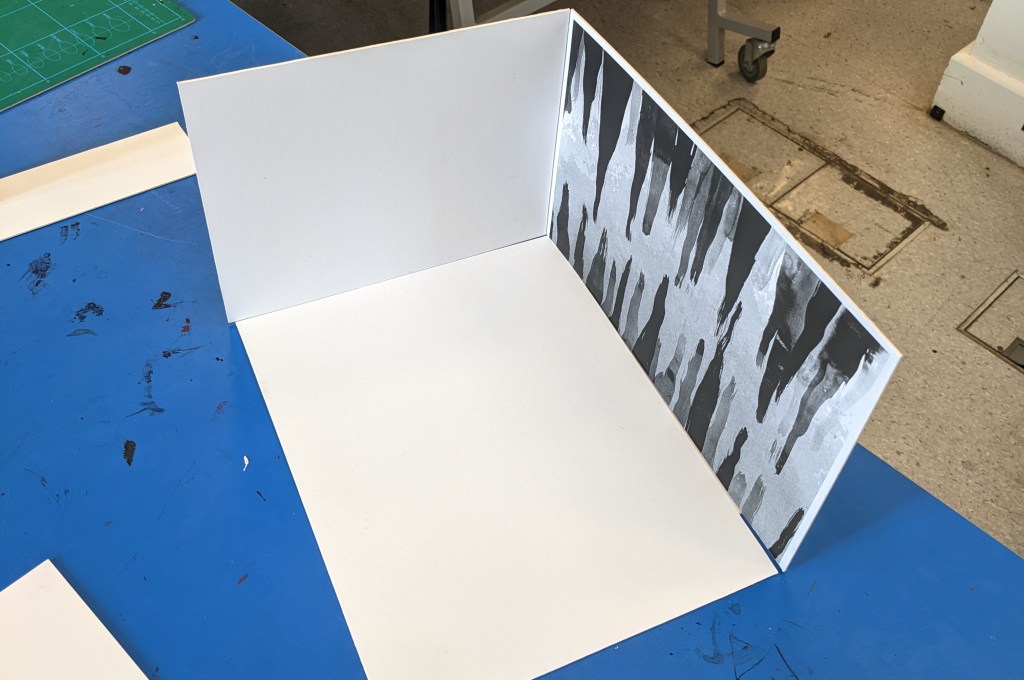
I talked to Jim and he really liked my 3D scene I created in the software. He suggested I make a real papercraft office – and I got excited, thinking that my chairs and table could sit in the office.
Here is the stage I made today, with the back wall being the trigger image for the same “hell elevator music” artwork I’ve shown previously.
And here we run into a huge problem: I have just about run out of views on the free version of Artivive. This is also stumping the profs: especially if my project relies on a view in the app, it becomes very hard to show proof of concept images.
I’ll have to say what happens. Who was it that said that a difficulty is a light, and an insurmountable difficulty is the sun? Paul Valery, apparently.
This week was throwing heavy. I trimmed and attached a handle to a little jug I threw last week too.
Turns out adding cool handles makes any thrown pot look incredible.
I absolutely love pulling my own handles. I actually dropped my handle into the bowl of water and had to fish it out, but it survived.
On my Christmas present grind now – just churning out various mug shapes to play with and get through the process.
I also glazed a pot I threw in the very first week! It’ll be good for cold drinks like orange juice or water, since we hadn’t done handles when I sent it through the bisque fire. I glazed it this lovely mix of white and shiny green that seems to come out aqua.
I made up another loose newsprint sketchbook, read back through the original text, and started brainstorming. For me, brainstorming is as much about the words as it is about the pictures. I will include a flip through or something similar once my notebook is full.
Jamie suggested office paraphernalia being the trigger image, and I loved it. Specifically, business cards. I had already had the idea for the Guardian Angel Form from my creative writing to be the trigger image, or something on a clipboard.
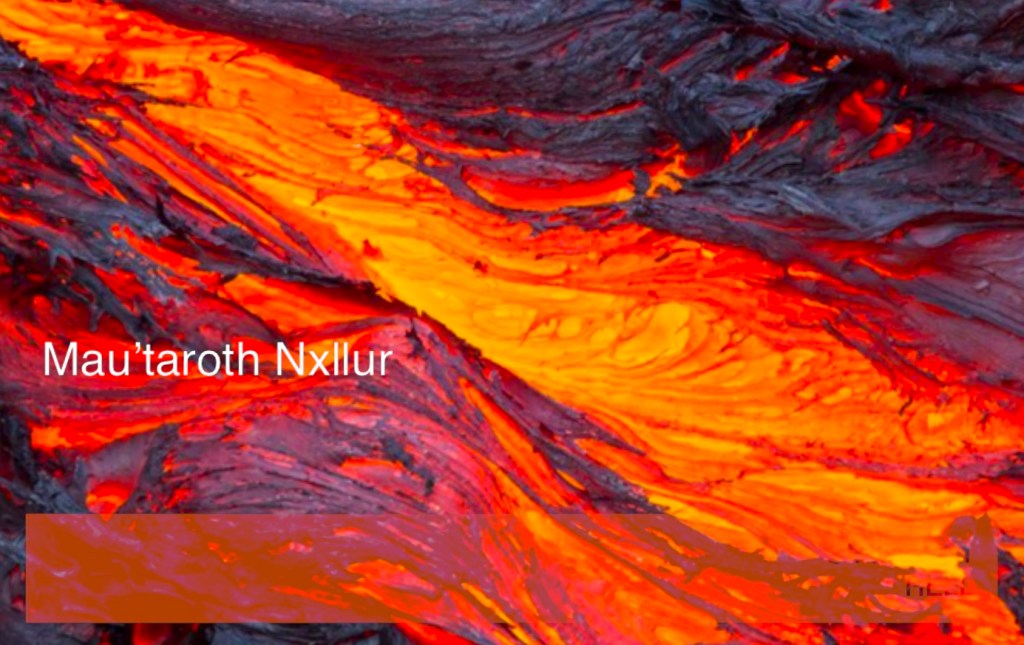
I had been really excited since I saw the app’s functionality to see if I could create entire scenes with the planes. This in mind, I threw together a table jpeg and some transparent chairs, and also hastily animated some bubbling lava behind a window, threw it into premier pro, paced it properly so it looped over about 15 seconds. I then downloaded some elevator music (from blues brothers, it’s important you know) and some “people screaming” sound effects. I love the juxtaposition between the clean office and the quiet screams. Do note that they get louder as the lava hits. It’s the little things.
This is a proof of concept illustration – I threw it all together just to see if I could. I LOVE how it turned out, though. It’s almost exactly how I saw it in my head. And I must say, I’m pretty pleased with myself to be using the software to create rooms and furniture, not just images.
Oh, evidencing problem solving!
Here is the trigger image, a business card.
This was the third design – the first two had low recognisabilities and didn’t load the content. That’s why the design is less than perfect – I needed it to work first and foremost. How do you like the name?
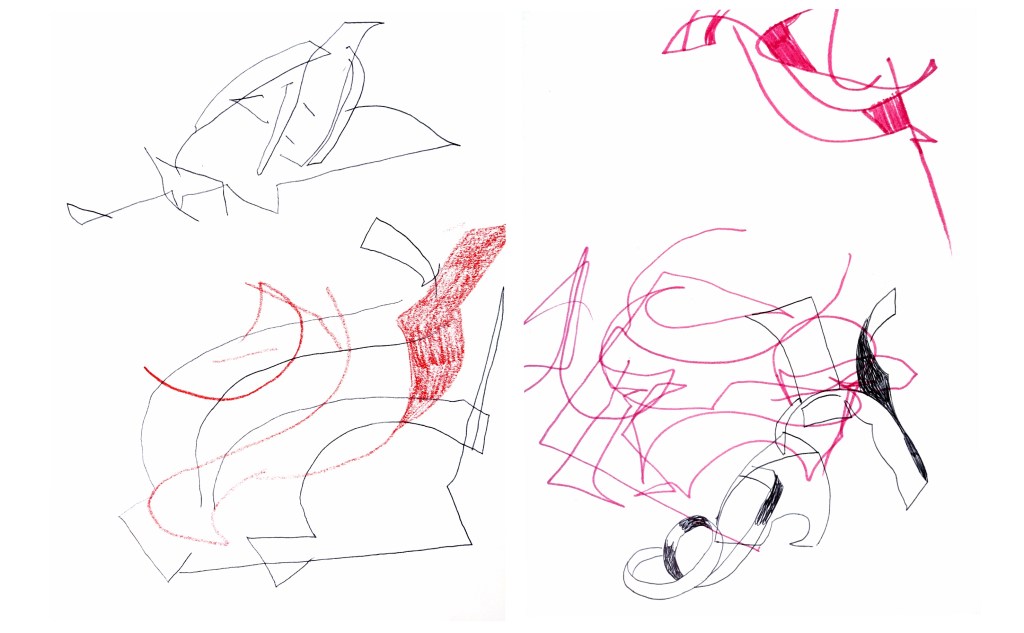
Today we looked at composition, using cool letters. I made a video that you can pause and sift through or enjoy in its wholeness. The true reason I embed this is because wordpress has very strict media limits on blogs, and it was about 100mb of photos down to 0mb in an embedded video. Clever!
Below are the blind drawings I did before, and after, making the paper sculpture.
I guess it’s time for a little critical thinking… what could I use this 3D method for? Phil suggested creating interesting spaces for my characters to move around in. The old docks, and the rock pools, and they bay, might be a really interesting space to visualise in a 3D or abstract way. I also thought, maybe the talent show, or the backrooms.
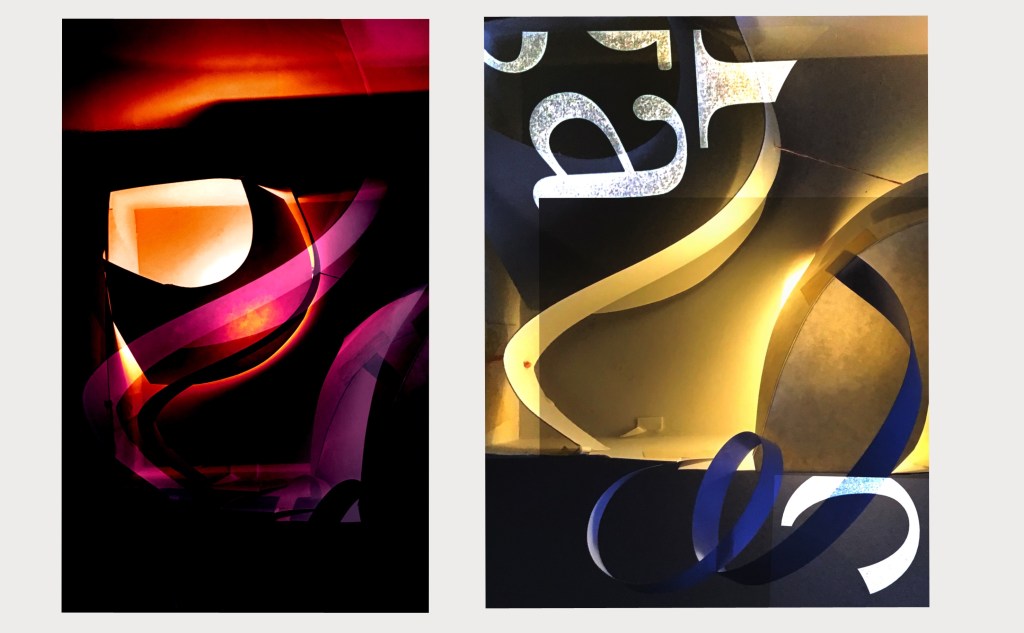
In my studio work, I’m working very 3D right now. The AR app lets you place planes of image on a 3D space and I am finding it so interesting.
I also very briefly started playing with colour and layering.
You would have to drag me away from the Pin Light blend mode kicking and screaming. That being said, I don’t actually think I used it here.
One thing I think I could really engage with is surface design. If nothing else, I enjoy patterning clothes on my characters. Maybe I could even take it into textile design and create some really mad work with brightly coloured stencils and paints.